May also be Suitable for other Small Spaces
| Center/Sub | MAINS | Surrounds | Assembly | Installation | Lou's Home Page |
| Completed Nov 13, 2009 |
|
Original Concept
We have a large detached garage that we had remodeled into a guest house/mother-in-law apartment. For most of it's life it's been occupied by our daughter while we both recovered from illness, various waifs, and friends of friends who needed a place to stay for awhile. The main living/bedroom is about 10 X 20. We decided to reclaim the space for us and short term guests. SWMBO ok'd a "small" home theater setup. There's really only one wall where it's practical. So I envisioned an "all in one" as the original concept.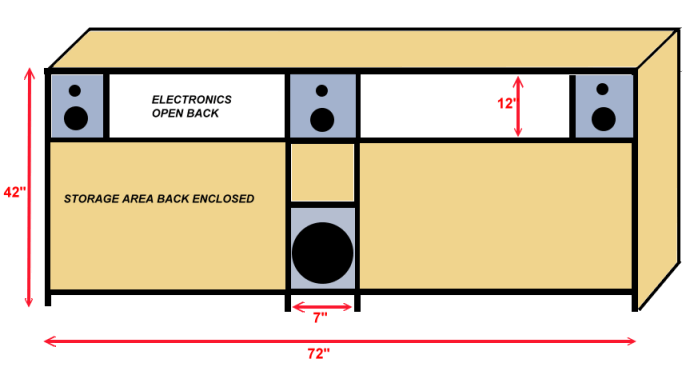
Many folks (including Xavier & PE forum members) tried to talk me out of this idea. Not very flexible. ( I might want to play with the mains a bit or change them. or test new designs...) Of course none of this changed my mind. Never been susceptible to group think.
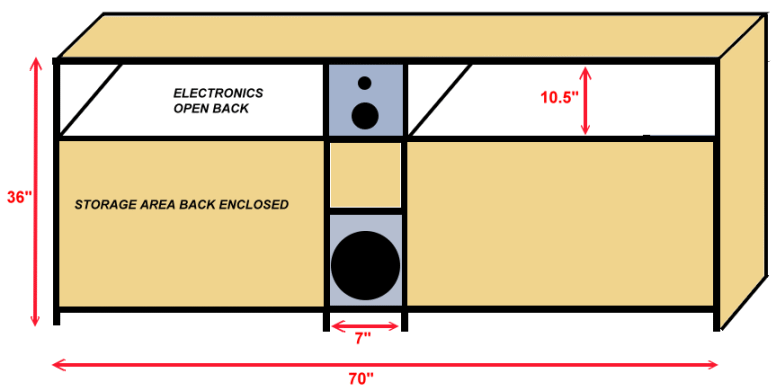
Revised "Final" Design
What did change my mind was the actual cabinet construction, the weight, and how the hell I would do the finishing. It was definitely too high. So I decided to do detached satellites but keep the center tower idea. So now the plan looks more like this.
Getting Ready
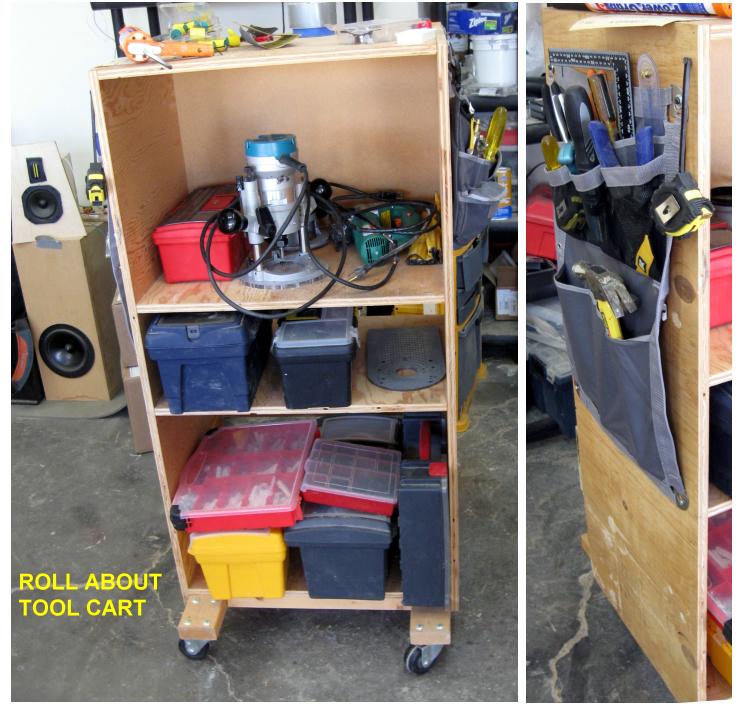
I recycled all of my old computers monitors and peripherals this summer. I built this cart to hold all my old measuring gear. Now that all fits in a catalog case and a laptop bag. So I converted the box into a rolling tool cart. It's roughly 4' high X 2' wide X 2' deep. Made out of one sheet of shop grade 3/4" plywood, masonite scraps, a couple of 2X4s, and some 3" casters from Habor Fright.
I got a nice laptop bag for $15 & this two piece tool bag with detchable pouch for $12. So now my most used tools, crossover parts, accessories etc. can be easily moved to the project, tablesaw or saw horses. Best idea I had in this whole build.
While I don't try to waste money, I keep acquiring "bargains" in drivers, sheet goods, veneer, electronics. I've had two 4X8 sheets of plywood in the shop for a couple of years. One is a Loews special. 5 ply with birch on one side, maple on the other. It will be used for the internal shelving -- when I get there.
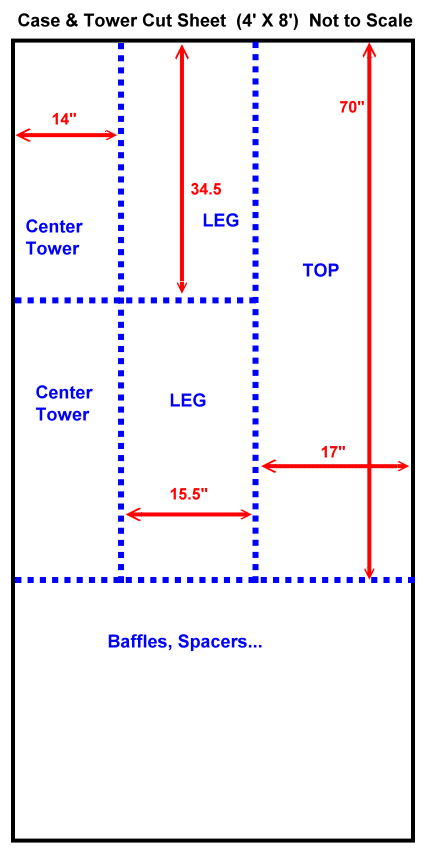
The second is a Chinese variant of 3/4" baltic birch. Unlike the real thing, these are 13 ply but the face veneer is very thin and tears out very easily while crosscutting. So this became the basis for the top, outside leg panels, and the center stack. The cut sheet is shown to the left.
I used my handheld circular saw to make the first cross cut at 70". With Xavier's help we ripped the top, legs and center towers on the table saw. Each of these was then halved with my panel cutter jig on the table saw.
I wanted a bit of front and rear overhang on the top. Eventually I will anchor the cabinet to the wall. But I needed some clearance for base molding & carpet strips. This should also be enough to fish out a dropped cable and use the AC outlet behind the cabinet.
The center tower and shelves will be 14" deep so I can pass cables around the back as needed.